
Guest Handbook
Where everything you need to know about our property, from check-in details and Wi-Fi information to local recommendations and emergency contacts is at your finger tips.
Essential Information
Welcome

Welcome to your home away from home!
We’re thrilled to have you as our guest and hope you’re ready for a wonderful stay!
Our goal is to provide you with a relaxing, comfortable, and memorable experience.
To help you settle in, we invite you to take a virtual walkthrough of the property with our 3D home tour.
This tour gives you a preview of all the amenities and spaces available, so you can feel right at home from the start.
Checking In

To make your arrival seamless and stress-free, we’ve simplified the check-in process:
Online pre-arrival form
Right after booking, you'll receive a link to a quick, easy online check-in form. It takes less than a minute to complete, requiring only your government-issued ID. Please complete the form as soon as possible to help us prepare for your stay.
Lock code
As soon as you complete the form, you’ll receive an automated message with your personalized lock code, which will be active exclusively for the duration of your stay. This ensures you have secure, easy access from the moment you arrive until you check out.
Check-in Time
4:00 PM | At or After
Check-out Time
11:00 AM | At or Before
Checking Out

Checking out is easy, and we just have a few simple requests before you go!
Check-out Guide
- If you used the grill, a quick clean of the grates would be greatly appreciated.
- Moved any furniture around? Just return it to its original spot.
- Have any suggestions? Send us a private message to help us keep improving for future guests.
Note: None of these are required, and they won’t affect your review—they’re simply small gestures that make a big difference!
Directions

Major Cross Roads
Boerne Stage Rd & Cross Mountain Trail
Major Highways
Interstate 10
Major Land Marks
From Cross Mountain Trail there will be a series of mailboxes just before you turn into the neighborhood.
Home Address
8844 Cross Mountain Trail #5, San Antonio, TX 78255, USA
How To Use Key Pad

Unlock door
Press "Yale", enter your assigned key code, and press "Check mark".
Lock door
To lock the door tap the "Yale".
Need Help?
If the code provided is not working, contact your host for assistance.
Item Shop

Check out our in-home item shop, where we bring convenience and comfort right to your doorstep. Our item shop is designed to cater to your needs when traveling to the store for essentials becomes a burden.
Explore our curated selection of items, carefully chosen to enhance your comfort and convenience during your stay.
House Guidelines

House Guidelines for a Comfortable Stay
Thank you for choosing our property! We aim to make your experience enjoyable and relaxing, and these guidelines help ensure a peaceful environment for all.
No Smoking Indoors
For everyone’s comfort, please enjoy smoking only in designated outdoor areas and dispose of cigarette butts responsibly. Thank you for helping us keep our space fresh!
No Parties or Events
Our property is designed for restful, residential use. We kindly ask that large gatherings and parties be avoided so everyone can unwind peacefully.
Quiet Hours
In consideration of our neighbors, please observe quiet hours from 10:00 PM to 8:00 AM. Your understanding is greatly appreciated!
Maximum Occupancy
To ensure comfort and safety, our space accommodates up to 10 guests, including both overnight guests and visitors.
Respect for Property and Neighbors
We’ve put a lot of care into creating a welcoming environment. Please treat the property and its furnishings with care. Guests are responsible for any damages caused during their stay.
Parking
Please park in the designated areas provided. Thank you for helping us keep things organized and accessible for everyone.
Security
For your peace of mind, ensure all doors and windows are securely locked whenever you leave the property.
Additional Guests
If you'd like to have additional overnight guests, please seek prior approval, as this may incur an extra fee. We’re happy to help accommodate you whenever possible.
By booking this property, you agree to these guidelines. Should there be any issues, there may be penalties, including additional fees and potential early termination of your stay. We appreciate your cooperation and hope you have a wonderful time!
Reservation Alterations

We strive to provide our guests with the utmost convenience and flexibility during their stay. To ensure a seamless experience, we offer complimentary early check-in and late check-out options, subject to availability and following the guidelines outlined below:
Early Check-In
Guests may request an early check-in at no additional cost, subject to availability.
While we try to accommodate early check-in requests, availability is subject to the property's occupancy and housekeeping schedule.
Guests will be notified of the availability of early check-in based on the property's current status.
Late Check-Out
Guests are welcome to request a late check-out free of charge, contingent upon availability.
Requests for late check-out must be submitted at least 24 hours before the scheduled check-out time.
Late check-out availability may vary depending on upcoming reservations and cleaning schedules.
Reservation Changes
Guests must communicate their early check-in, late check-out, and reservation alteration requests directly to the host via the booking channel messaging platform or other agreed-upon communication channels.
Any changes to the reservation, including early check-in or late check-out requests, are subject to confirmation by the host.
Guest Responsibilities
Guests are expected to adhere to the agreed-upon changes to their reservation to ensure a smooth transition between guests.
If guests anticipate a delayed departure or early arrival, they should promptly notify the host to make necessary arrangements.
Host Discretion
The host reserves the right to deny reservation alterations including early check-in, or late check-out requests if they interfere with the property's operational needs or subsequent reservations.
In cases where early check-in or late check-out cannot be accommodated, the host will inform the guest as soon as possible and provide alternative solutions if available.
Wifi & Internet

Enjoy complimentary WiFi during your stay - stay connected, stream, and share your adventures hassle-free.
Connecting to the internet
WIFI: Stay BlueBonnet Guest
WIFI Password: sbbguest
Resetting Router / Modem
This home is equipped with a router/modem rebooting device that monitors internet health constantly for the home network. It will automatically reboot the router/modem to restore your internet connection if issues are detected.
In the event you need to manually reboot the router/modem reach out to your host for assistance.
Parking

Parking Information
Guests have access to complimentary on-site parking via an uncovered driveway, which comfortably accommodates up to five vehicles.
Please note, however, that the driveway is not suitable for trailers or towing setups, and there is no garage on the property.
Liability & Responsibility
Guests are responsible for adhering to all local parking regulations and are liable for any violations incurred during their stay. The host is not liable for any damage, theft, or towing of guest vehicles.
Disclaimer
To ensure a smooth experience, we ask that all guests comply with our parking guidelines. Non-compliance may result in vehicle towing at the guest's expense.
Pet Policy

Pet-Free Environment
While we adore our furry friends, we regret to inform you that this property is designated as pet-free. This decision is made with the utmost consideration for the comfort and well-being of all our guests, including those with allergies or sensitivities.
Our Commitment to Comfort
Upholding a pet-free environment enables us to maintain a pristine and inviting space for every guest to enjoy. It ensures peace of mind and minimizes potential disruptions with future reservations.
Exception for Service Animals
We fully recognize and accommodate service animals that assist individuals with disabilities. If you require the assistance of a service animal during your stay, please inform us in advance so that we can make the necessary arrangements to ensure your comfort and convenience.
Assistance and Clarification
Should you have any inquiries or require further clarification regarding our pet policy, please feel free to reach out to us.
We sincerely appreciate your understanding and cooperation in adhering to this policy.
Lifetime Fitness (Paid Day Pass)

Lifetime Fitness is a chain of luxury fitness centers known for offering a wide range of amenities and services to its members.
- State-of-the-Art Gym Equipment
- Indoor and Outdoor Pools
- Showers, Steam Rooms, Saunas
- Child Care Services
- Café and Healthy Dining Options
- Spa and Salon Services
- & more...
Location
Lifetime Fitness is located in The Rim, it's just a short drive from the home (10 mins).
Paid Day Pass
You have the flexibility to purchase a day pass to Lifetime Fitness and experience all they have to offer, even if you're not a full-time member. Simply pay for your day pass, and you'll have access to their world-class facilities for the entire day. It's the perfect option for travelers who want to stay active and maintain their fitness routine while on the road.
For any inquires give them a call at: (210) 222-1984
We are not affiliated with Lifetime Fitness and hold no influence over their prices, hours, operations, etc.
Package / Food Deliveries

To ensure a smooth and efficient package and food delivery experience, we've put together some helpful information and instructions for you.
Property Address
8844 Cross Mountain Trail #5
San Antonio, TX 78255, USA
To assist your courier, please provide a GPS link in the “Special Instructions” section whenever possible.
Delivery Recommendations
Amazon Deliveries
For Amazon orders, we recommend using the nearby Amazon locker, “Handsaw,” located at the Valero gas station down the street. This option is both secure and free, offering the best way to guarantee that your package arrives safely.
Important Note
Please avoid scheduling deliveries to the home prior to your stay, as the property may be occupied by other guests.
Trash Pickup
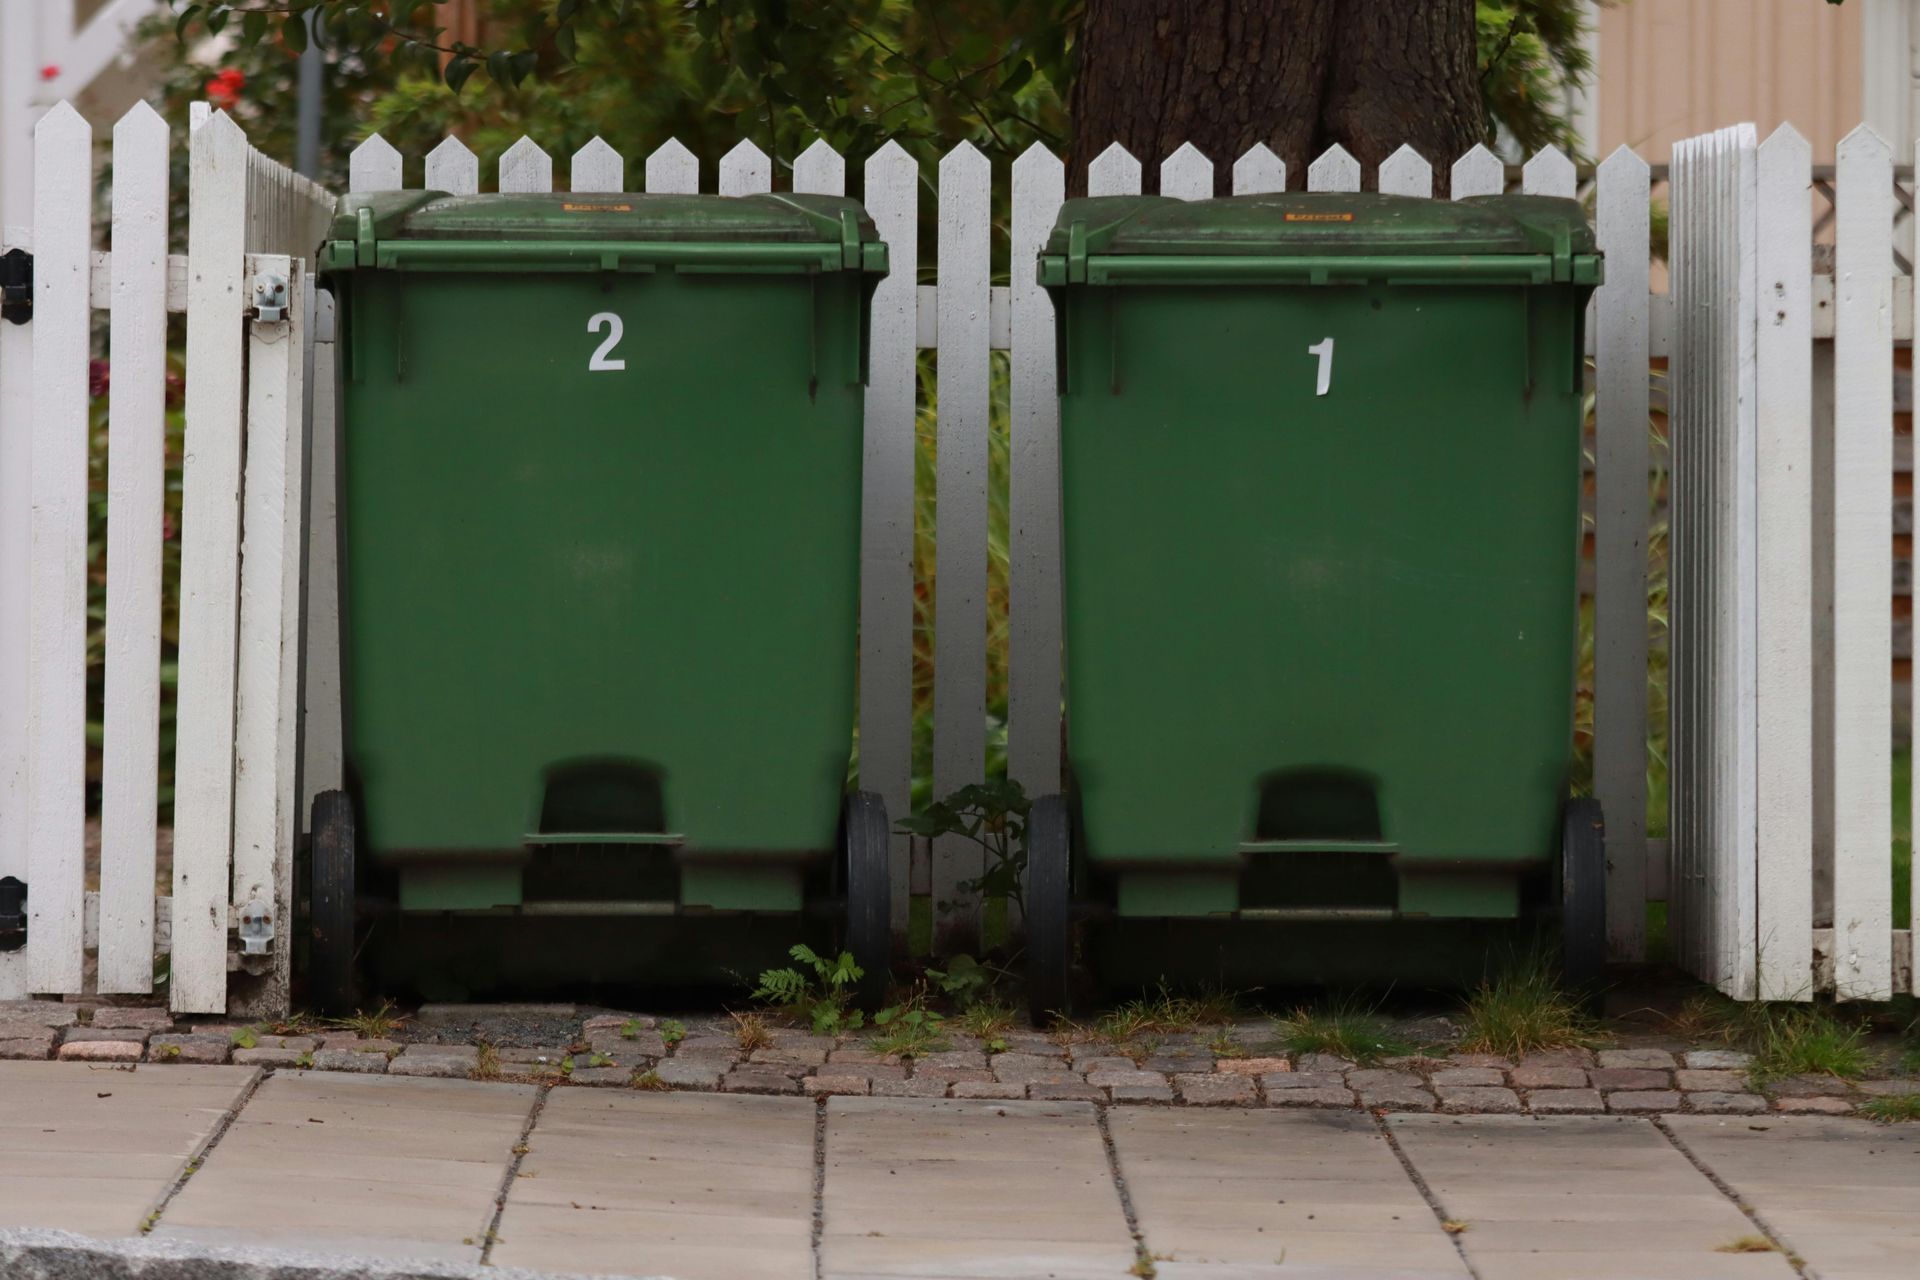
Trash pickup time
Every Wednesday, typically in the mornings.
Instructions
Please ensure that all trash is inside the waste bin and that the waste bin lid is fully closed before the scheduled pickup time. Bins should be placed alongside the road.
Home Plumbing
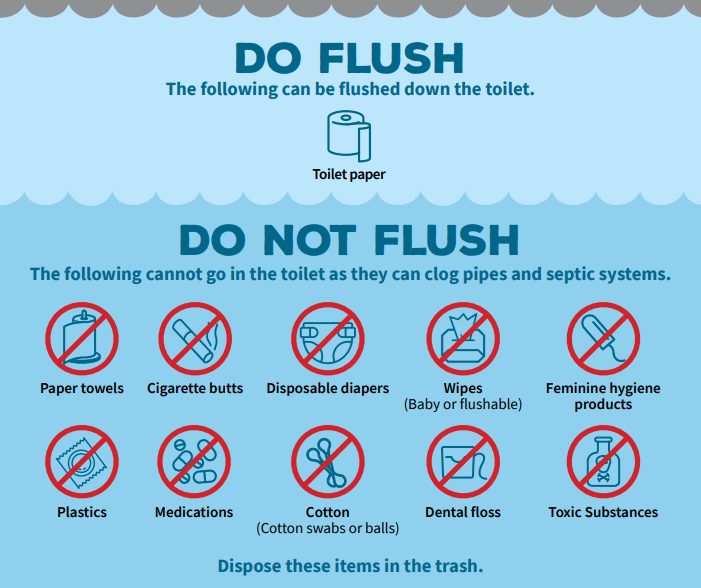
We kindly request your assistance in maintaining our septic system's functionality by only flushing toilet paper down the toilet.
As you may know, septic systems can be sensitive to the types of materials introduced into them. Flushing items other than toilet paper can lead to clogs and other issues that are not only inconvenient but also costly to resolve.
Thank you for your understanding and cooperation!
Emergency
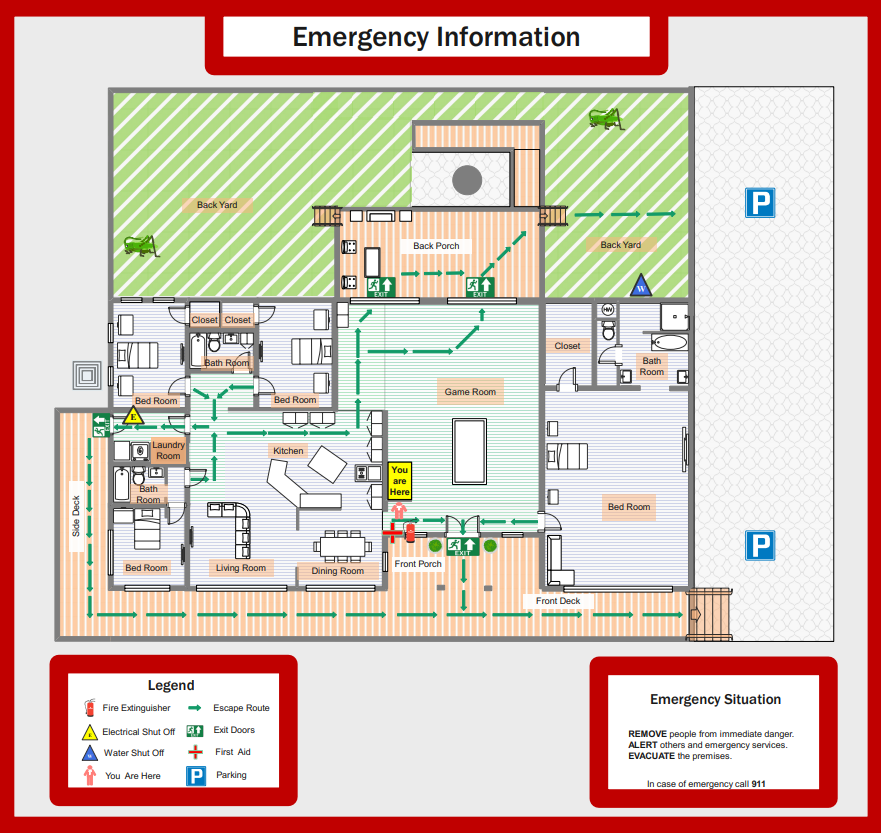
Make sure to communicate and inform your host of any emergencies.
Emergency Contact Numbers
Police, Ambulance, Fire: 911
Nearest hospital or medical center
Methodist Hospital
Address: Main Entrance, 7700 Floyd Curl Dr, San Antonio, TX 78229
Hours: Open 24 hours
Phone: (210) 575-4000
Water Shut-off
In case of emergency, you may need the ability to shut off the water to the home. Below is a description of where and how this can be done.
Location
In the backyard, alongside the home, nearest to the driveway. It is inside a green irrigation box on the ground.
How to Shut Off
Lift the irrigation box lid. Slowly turn the valve clockwise to stop water flow to the home.
Electrical panel
In case of emergency, you may need the ability to turn off electricity to sections or the entire home. Below is a description of where and how this can be done.
Breaker Box Location
Laundry room, on the wall
Identify the Breaker
Each switch in the breaker box corresponds to a different circuit in your home. They are typically labeled, indicating which area or appliance they control. Identify the breaker you want to turn off. If you are unsure there is always a main breaker switch that turns off all power to the home.
Turn Off the Breaker
Firmly push the switch of the breaker to the "Off" position. This means flipping it from the "On" position to the opposite side, usually downward.
First Aid Kit
Location
Hanging on the wall, near the front door.
Contents
Bandages, antiseptic wipes, gauze, adhesive tape, scissors, tweezers, pain relievers, etc.
Emergency Lighting
Provided flashlights and spare batteries are in the upper kitchen cabinet labeled "Kitchen/Cleaning Supplies" in case of a power outage. Some ceiling lights in the bathroom are designed to work for a limited time during power outages.
Fire Extinguisher
Operational instructions are written on the extinguisher.
Location
Hanging on the wall, near the front door.
Helpful Resources
SAT Airport information on flight arrivals & departures
Rent baby equipment for holidays and vacations. All the baby gear and furniture you need: cribs, strollers, car seats, toys, etc.
Looking for a luggage storage solution? Store your luggage with Radical Storage! ✓Available worldwide ✓ Best price ever ✓100% safe ✓Highly rated
Amenities (How To Use)
AC & Heat
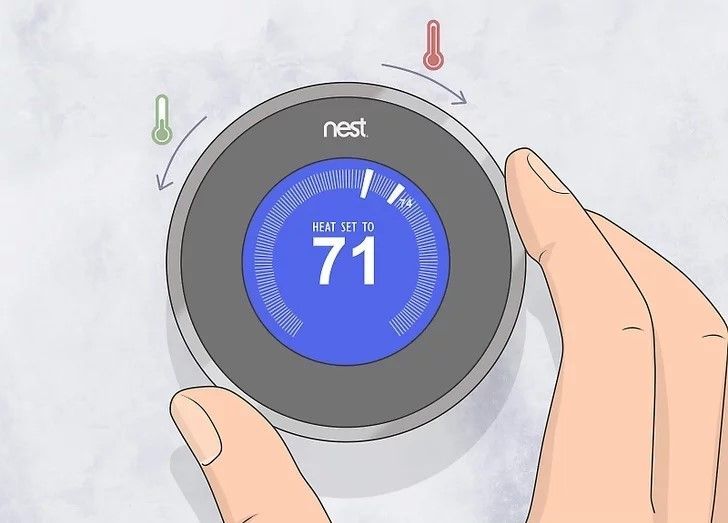
Basic Navigation
The Nest thermostat has a circular display and a metal outer ring that you can turn to navigate through menus and make selections. Simply rotate the outer ring to move through options and push it to select.
Adjusting Temperature
To adjust the temperature, simply turn the outer ring clockwise to increase the temperature or counterclockwise to decrease it. The display will show the current temperature and the target temperature as you adjust it.
Charcoal Grill

Prepare the Grill
Start by ensuring your grill is clean and in good condition. Remove any ash or debris from previous uses. Check the vents to ensure they're not blocked, as they control airflow which affects the temperature inside the grill.
Lighting the Charcoal
There are several methods to light charcoal:
a. Chimney Starter: Fill the chimney starter with charcoal and place some crumpled newspaper underneath. Light the newspaper from below, and the flames will ignite the charcoal. Once the coals are glowing red and covered in ash (typically 15-20 minutes), carefully pour them onto the grill.
b. Charcoal Lighter Fluid: Place the charcoal in the grill and arrange them in a mound. Lightly drizzle charcoal lighter fluid over the coals, following the instructions on the fluid's label. Wait a minute or two for the fluid to soak in, then carefully light the coals. Exercise caution and avoid using too much fluid to prevent flare-ups.
Controlling Temperature
The key to successful grilling is controlling the temperature. This is achieved by adjusting the airflow using the vents. Opening the vents allows more oxygen to reach the coals, increasing the temperature, while closing them reduces airflow and lowers the temperature.
Setting Up Cooking Zones
Create different heat zones on your grill by arranging the charcoal accordingly. For direct heat, place the coals directly beneath the food. For indirect heat, push the coals to one side or create a ring around the perimeter of the grill, leaving a space in the center. This allows you to sear food quickly over high heat and then move it to a cooler area to finish cooking.
Grilling
Once the grill reaches the desired temperature, it's time to start cooking. Place your food on the grill grate using tongs, and remember to keep the lid on as much as possible to maintain an even temperature and retain the smoky flavor.
Extinguishing the Coals
Once you're finished cooking, close the vents to cut off the oxygen supply and suffocate the coals. This will extinguish them, allowing you to reuse any remaining charcoal for your next grilling session. Make sure the grill is completely cool before storing it.
Dishwasher
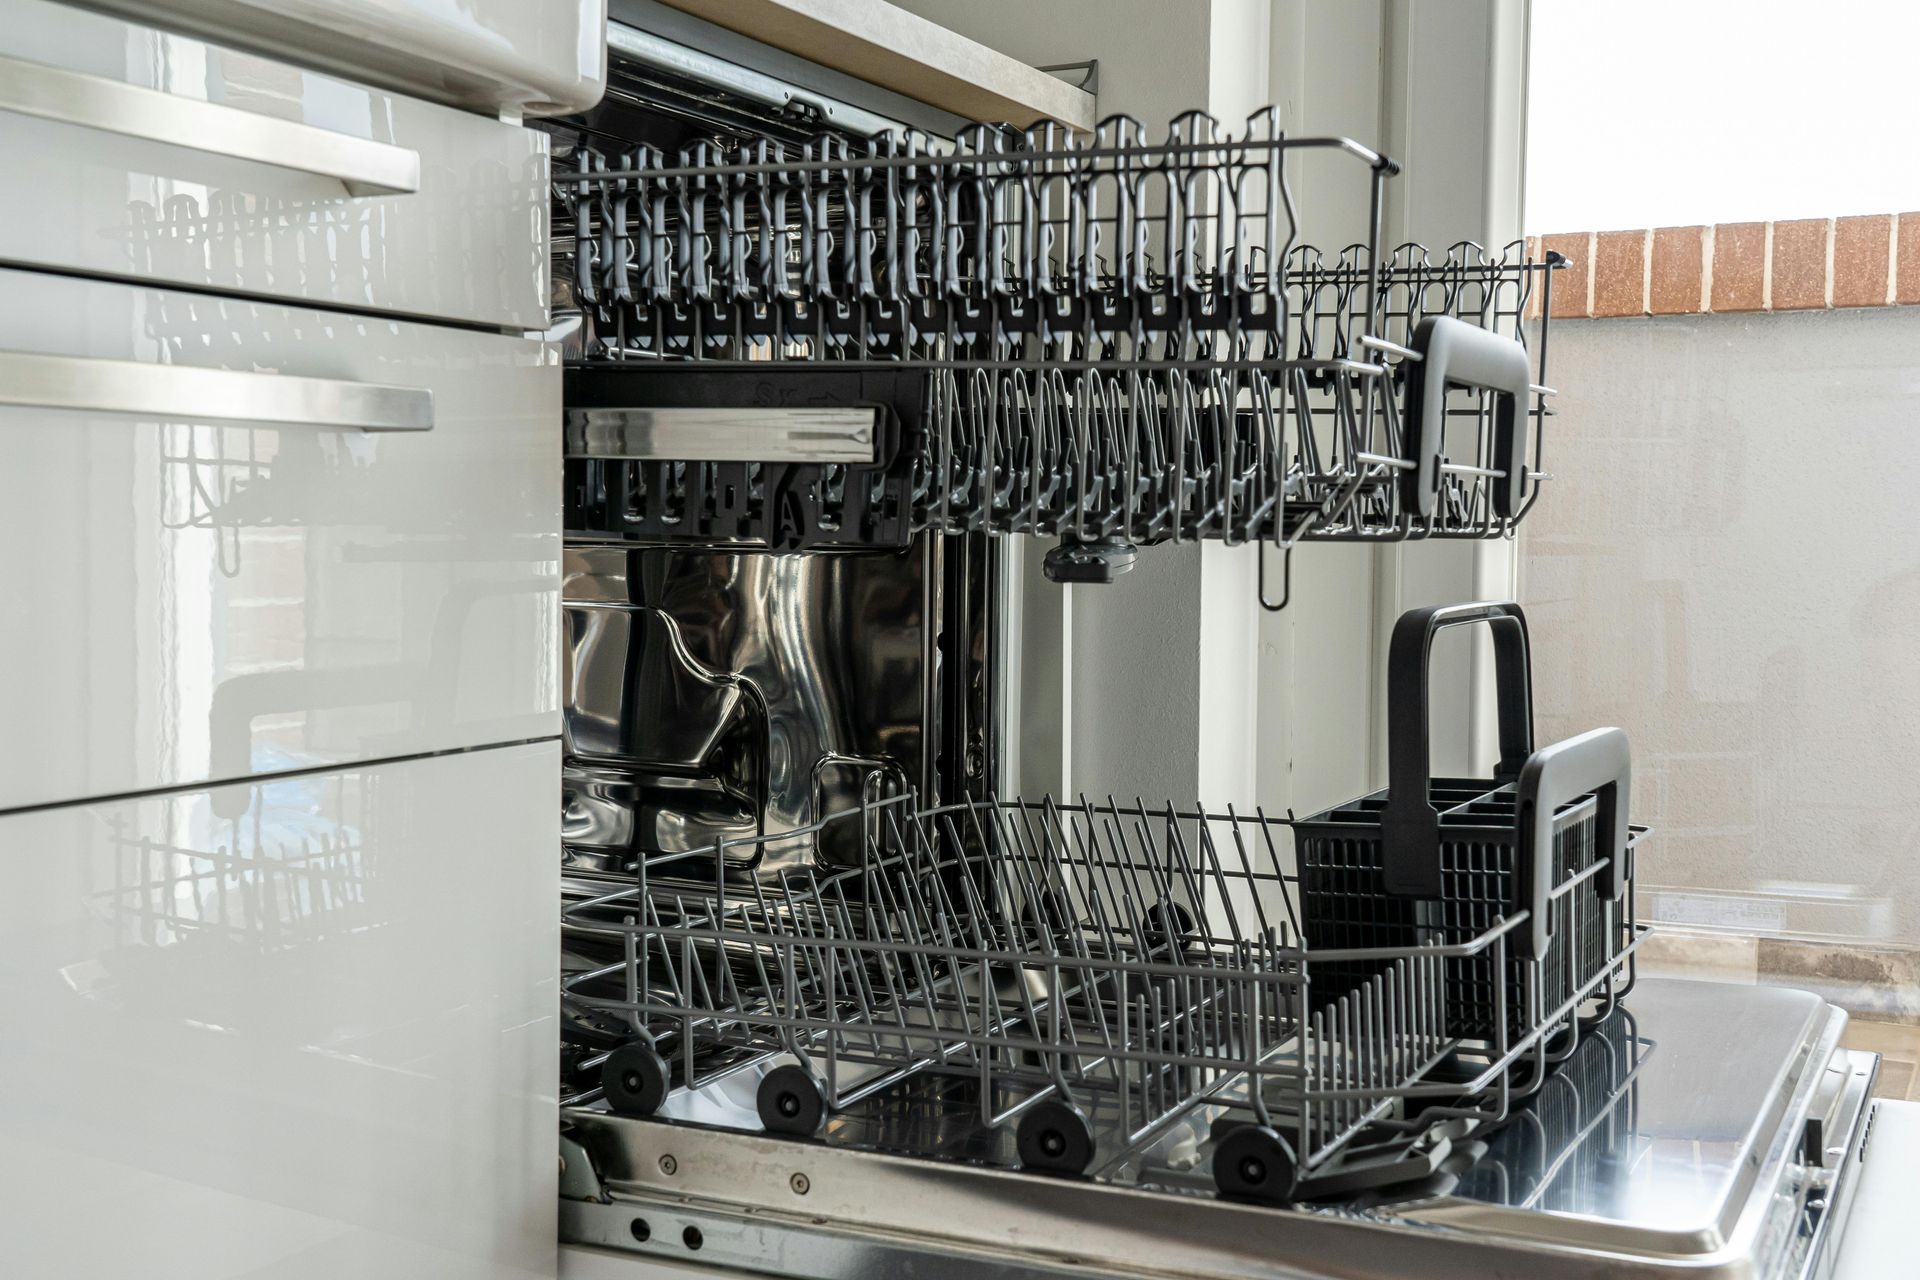
Preparation
Scrape off excess food from dishes before placing them in the dishwasher. While dishwashers are designed to handle dirty dishes, removing large food particles helps prevent clogs and ensures a cleaner wash.
Check the dishwasher for any items that are not dishwasher safe, such as wooden utensils or delicate glassware.
Loading the dishwasher
Place large items like pots, pans, and bowls on the lower rack, facing downward.
Arrange plates, glasses, and smaller items on the upper rack. Make sure to space items apart to allow water and detergent to reach all surfaces.
Avoid nesting items or blocking the spray arms, which can hinder the cleaning process.
Adding detergent
Open the dishwasher detergent tray located on the dishwasher door.
Place the dishwasher detergent pod into the tray and close the tray lid. Do not use any other detergents or soaps such as dish soap. Other detergents may produce excessive suds or not clean effectively.
Selecting a wash cycle
Most dishwashers offer a variety of wash cycle options, such as normal, heavy-duty, quick wash, or eco-friendly cycles.
Choose the cycle that best suits your load. For heavily soiled dishes, select a stronger cycle, while lighter loads may require a shorter cycle.
Starting the dishwasher
Close the dishwasher door securely.
Press the power button to turn on the dishwasher.
Select the desired wash cycle using the control panel.
Press the start button to begin the wash cycle.
Post-wash care
Once the wash cycle is complete, wait for a few minutes before opening the dishwasher to allow the dishes to cool down.
Carefully unload the dishes, starting with the bottom rack to prevent any water on the upper rack from dripping onto the clean dishes below.
Leave the dishwasher door slightly ajar to allow moisture to escape and prevent the growth of mold and mildew.
Firepit

Prepare the fire pit
Clean out any debris or ashes from previous fires. Arrange the firewood in the fire pit, making sure not to overcrowd it. Leave enough space for air to circulate, which will help the fire burn efficiently.
Gather firewood
Use dry, seasoned firewood for your fire. Green or wet wood can create excessive smoke and produce less heat. You can also use fire starters or kindling to help get the fire going.
Light the fire
Use a lighter to ignite the firewood. Start with small pieces of kindling to help establish the flames, then gradually add larger pieces of wood as the fire grows.
Maintain the fire
Once the fire is burning steadily, you can continue to add more firewood as needed to keep it going. Use a poker or tongs to rearrange the logs and ensure proper airflow.
Monitor the fire
Keep an eye on the fire at all times, especially if there are children. Avoid leaving the fire unattended, and never leave it burning overnight.
Extinguish the fire
When you're finished using the fire pit, allow the firewood to burn down completely to ash. Spread out the ashes evenly, then pour water over the embers to extinguish any remaining hot spots. Stir the ashes to make sure everything is thoroughly wetted down.
Dispose of ashes safely
Once the ashes have cooled completely, you can dispose of them. Avoid placing hot ashes in plastic or combustible containers, as they can pose a fire risk.
Home Security Alarm
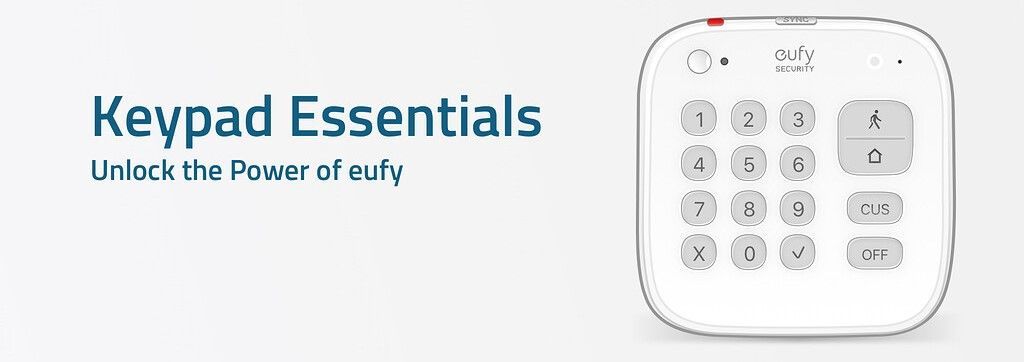
This home comes equipped with a home security alarm. Operational directions are below.
Arming the System
Enter the access code. Press the customized button "CUS". The alarm will be delayed for 3 minutes until the alarm becomes active.
Disarming the System
You will have 3 minutes until the alarm will sound. Enter the access code. Press the "Home" button. The alarm is now deactivated.
Access Code
8844
Keurig Coffee Machine

Prepare Your Keurig
Make sure your Keurig is plugged in and the water reservoir is filled with water.
Turn On the Machine
Switch on the Keurig by pressing the power button. It may take a minute or two for the machine to heat up.
Insert a K-Cup
Open the K-Cup holder by lifting the handle at the front of the machine. Place your preferred K-Cup pod into the holder. Make sure the pod is properly aligned. Close the K-Cup Holder: Lower the handle to close the K-Cup holder securely. This punctures the top and bottom of the pod, allowing water to flow through.
Select Brew Size
Keurig machines typically have buttons for different brew sizes, such as 6 oz, 8 oz, or 10 oz. Select your desired brew size by pressing the corresponding button.
Brew Your Beverage
Once you've selected the brew size, the Keurig will start brewing. It may take a minute or two for the beverage to be ready, depending on the size.
Remove Your Drink
When the brewing process is complete, carefully lift the handle to open the K-Cup holder. Remove the used K-Cup and dispose of it properly.
Enjoy Your Drink
Your freshly brewed beverage is now ready to enjoy. Be cautious as it may be hot.
Oven
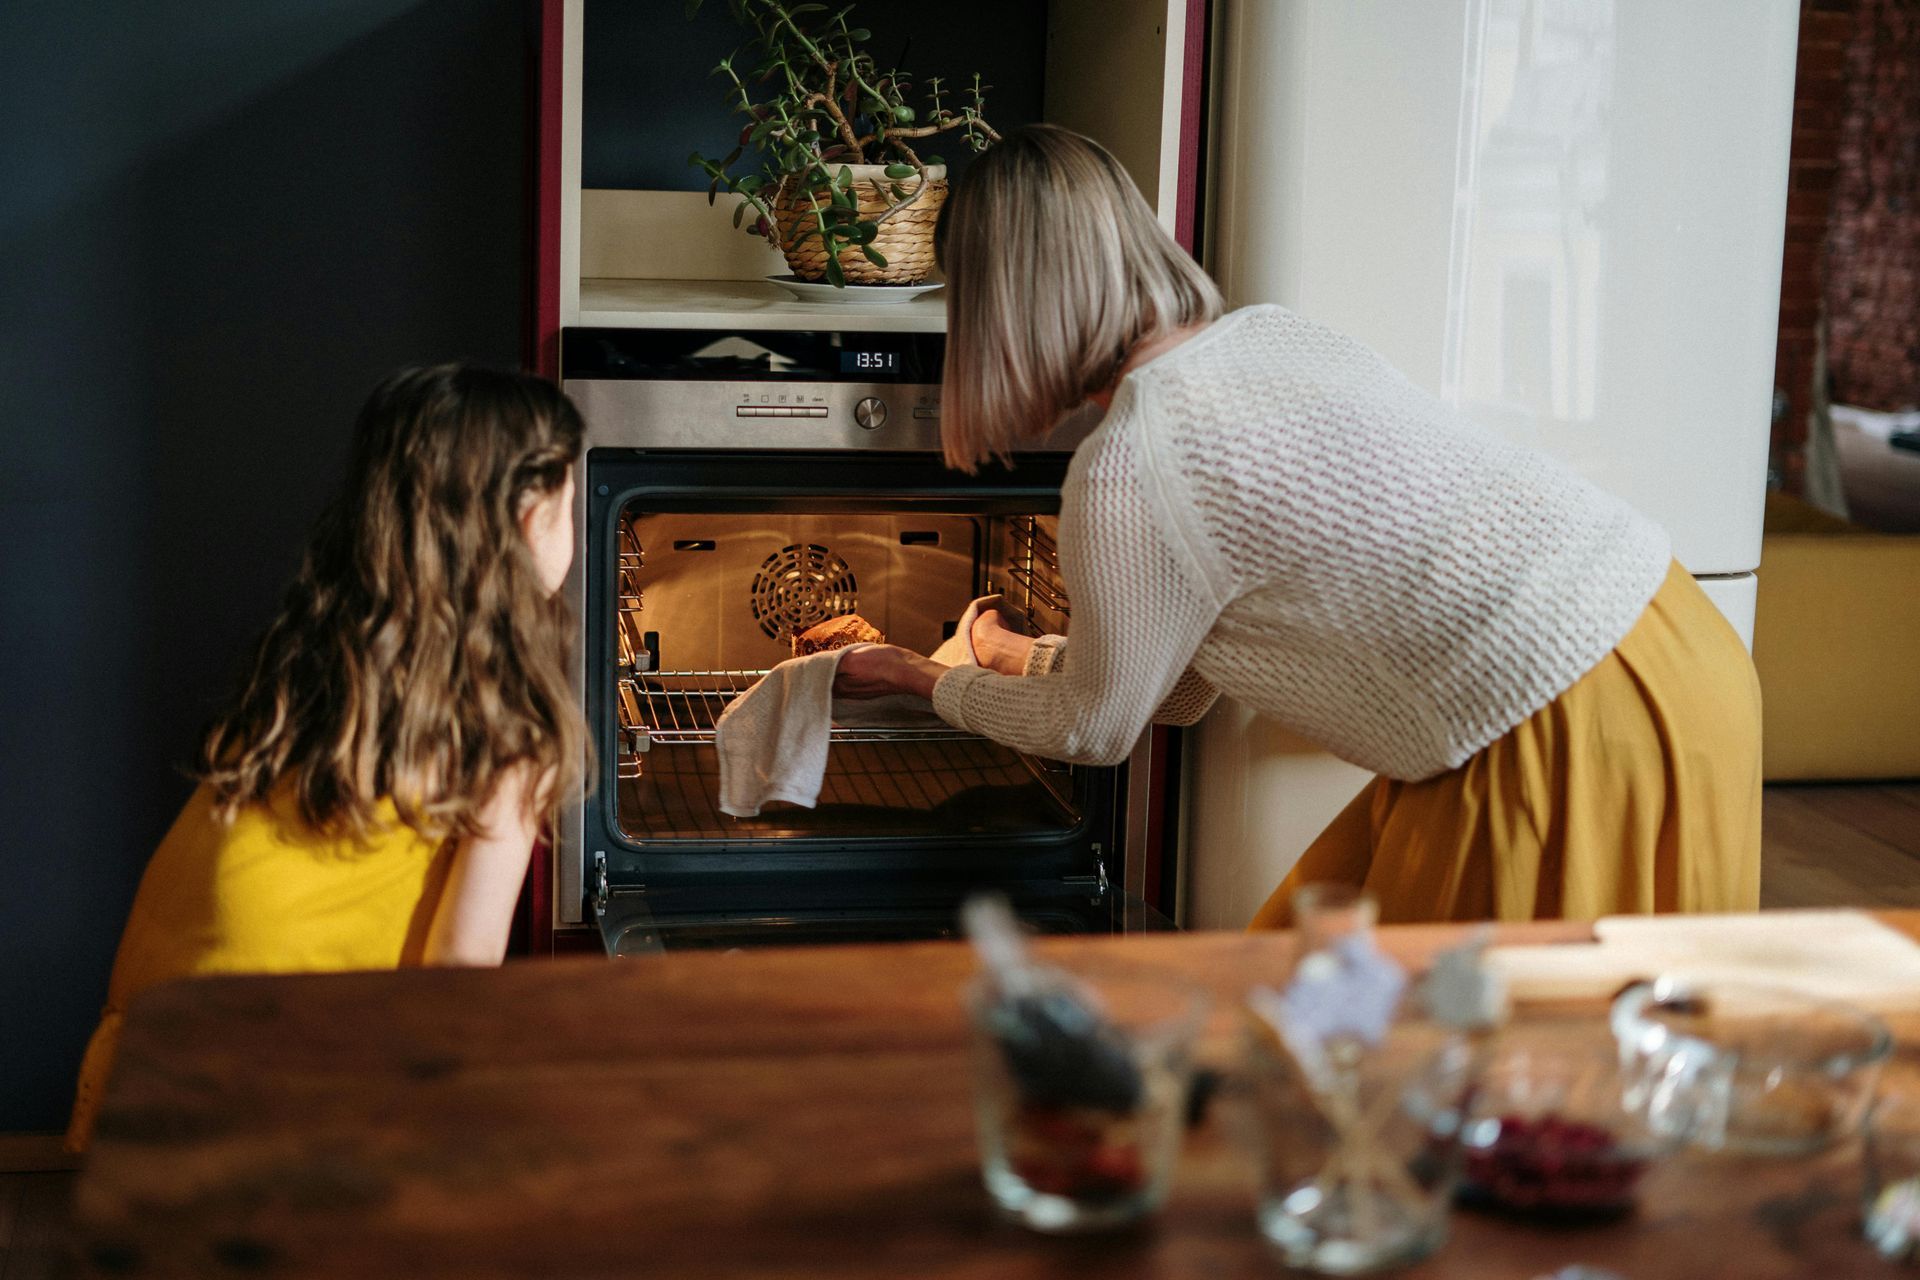
Operating an oven involves several steps, but it's quite simple once you get the hang of it.
Understanding Oven Controls
Familiarize yourself with the controls of your oven. Typically, ovens have knobs or digital panels to control temperature, timer, and other settings.
Preheating the Oven
Turn the oven on by selecting the appropriate cooking mode (bake, broil, convection, etc.). Then, set the desired temperature using the temperature control knob or digital panel. Allow the oven to preheat to the specified temperature. Most ovens have a preheat indicator light that turns off when preheating is complete.
Selecting Cooking Mode
Depending on what you're cooking, choose the appropriate cooking mode. Common modes include:
Bake: Used for general baking.
Broil: Used for cooking food under direct heat from the top heating element.
Convection: Utilizes a fan to circulate hot air for even cooking.
Self-Clean: Used for cleaning the oven.
Setting the Timer
If your oven has a built-in timer, set it according to the recipe instructions or your desired cooking time. Some ovens also have delay-start features that allow you to program the oven to start cooking at a later time.
Loading Food into the Oven
Once the oven is preheated, place your food on an oven-safe dish or tray and carefully insert it into the oven. Use oven mitts to avoid burns.
Monitoring Cooking Progress
Keep an eye on your food through the oven window or by briefly opening the oven door. Avoid opening the door too frequently, as this can cause heat loss and affect cooking times.
Checking for Doneness
Use a meat thermometer, oven thermometer, or visual cues to determine if your food is cooked to the desired level of doneness.
Turning Off the Oven
Once your food is cooked, turn off the oven using the control knob or digital panel. Remember to turn off the oven timer if you've set one.
Removing Food from the Oven
Carefully remove your cooked food from the oven using oven mitts or heatproof gloves. Place it on a heatproof surface to cool.
Cleaning the Oven
Allow the oven to cool completely before cleaning. Wipe down the interior with a damp cloth or sponge to remove any food spills or splatters. Always follow safety precautions when operating an oven, such as using oven mitts, avoiding leaning on the oven door, and keeping flammable objects away from the oven while it's in use.
Roku Smart TVs

Stove

Preparation
Ensure the stove area is clean and free from any debris, spills, or clutter that could pose a fire hazard.
Make sure there are no flammable materials (such as paper towels, dishcloths, or curtains) near the stove.
Check that all stove components, including burners, knobs, and oven racks, are in place and in good condition.
Ignition
Simply turn the knob for the desired burner to the desired heat level. Electric stoves typically have indicator lights that illuminate when a burner is on.
Adjusting Heat
Adjusting the heat is done by turning the knob to the desired temperature setting. The indicator light will cycle on and off as the burner maintains the selected temperature.
Cooking
Place cookware on the burner, ensuring it's centered and stable. Use pots and pans with flat bottoms to ensure even heat distribution.
Add ingredients to the cookware and cook according to your recipe's instructions.
Stir or flip food regularly to prevent burning or uneven cooking.
Safety Precautions:
Never leave a stove unattended while it's in use.
Use oven mitts or pot holders when handling hot cookware or reaching over hot burners.
Keep flammable materials, such as dish towels and curtains, away from the stove.
Use the stove's ventilation system or open windows to prevent the buildup of smoke or fumes.
Turning Off the Stove
Once cooking is complete, turn off the burner by turning the knob for the corresponding burner to the "Off" position.
Wait for the indicator light to turn off before assuming the burner is fully cooled.
Cleaning Up
Allow the stove and burners to cool completely before cleaning.
Wipe down the stove surface with a damp cloth or sponge to remove any spills or splatters.
Washer & Dryer
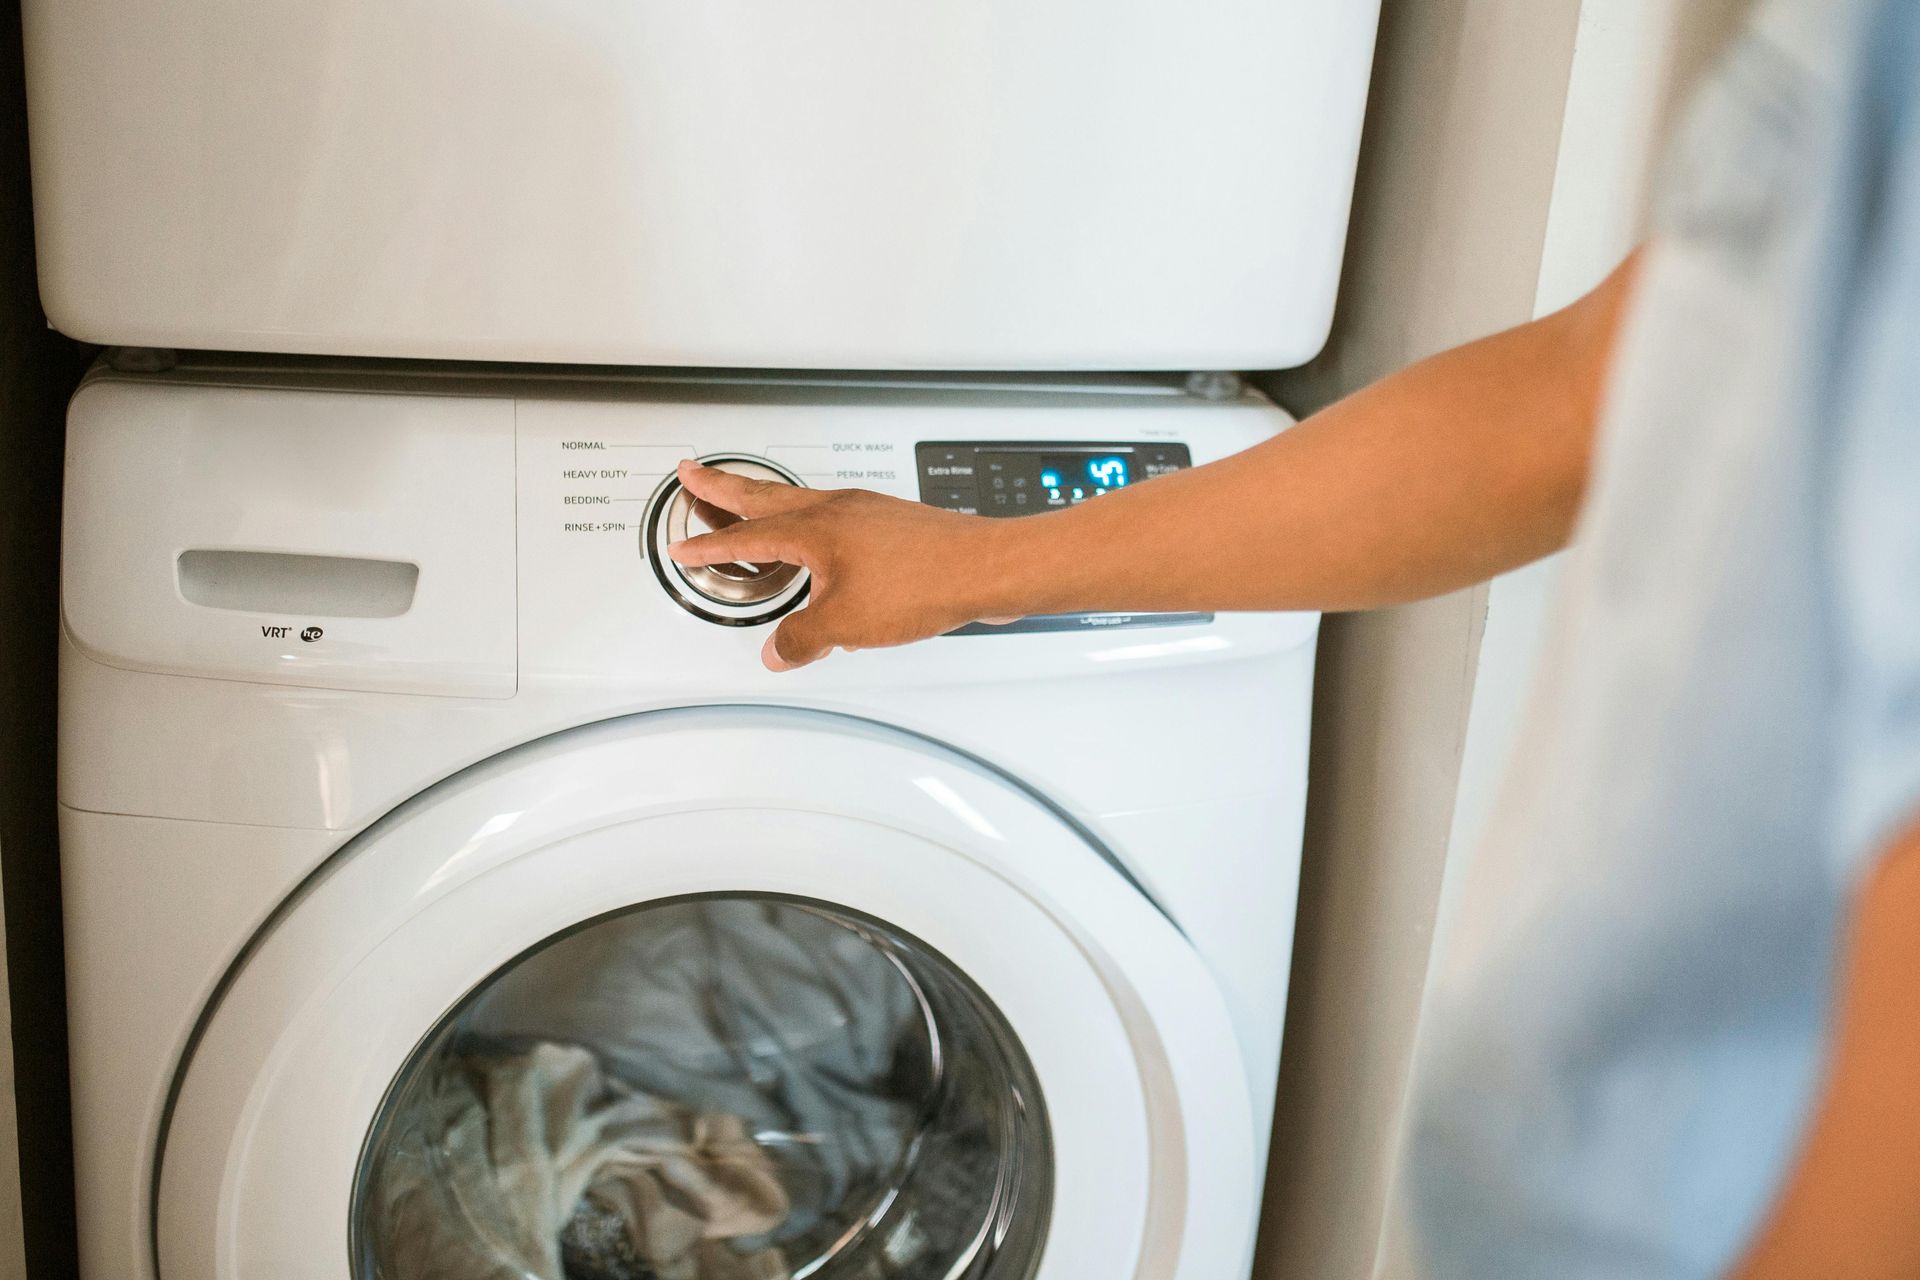
Using the Washer
Load the Washer
Open the washer lid or door. Load your sorted laundry into the drum, making sure not to overload it. Overloading can prevent clothes from getting clean and may cause damage to the machine.
Add Detergent
Add a single detergent pod directly into the drum with the clothes.
Select Settings
Choose the appropriate settings for your laundry load. This may include water temperature, cycle type (normal, delicate, heavy-duty), and cycle duration.
Start the Washer
Close the washer lid or door securely. Press the start button to begin the cycle.
Wait for the Cycle to Complete
The washer will automatically go through its cycle, which typically includes filling with water, agitating the clothes, draining, rinsing, and spinning to remove excess water.
Unload the Washer
Once the cycle is complete, open the washer and remove your clean laundry. Shake out any wrinkles and transfer them to the dryer.
Using the Dryer
Load the Dryer
Open the dryer door and load your clean, damp laundry into the drum. Again, avoid overloading to allow proper air circulation for drying.
Add Dryer Sheets (Optional):
If you want to add a fresh scent and reduce static cling, consider adding a dryer sheet to the load.
Select Settings
Choose the appropriate settings for your laundry load. This may include drying time, temperature (low, medium, high), and cycle type (regular, delicate, permanent press).
Start the Dryer
Close the dryer door securely and press the start button to begin the drying cycle.
Monitor the Drying Process
Periodically check on the drying progress. You may need to adjust the settings or remove items that dry more quickly to prevent over-drying.
Unload the Dryer
Once the cycle is complete, open the dryer door and remove your dry laundry. Fold or hang clothes immediately to prevent wrinkles.
Clean the Lint Trap
After each use, remember to clean the lint trap to maintain proper airflow and prevent fire hazards.
Games (How To Play)
Pool | 8-Ball
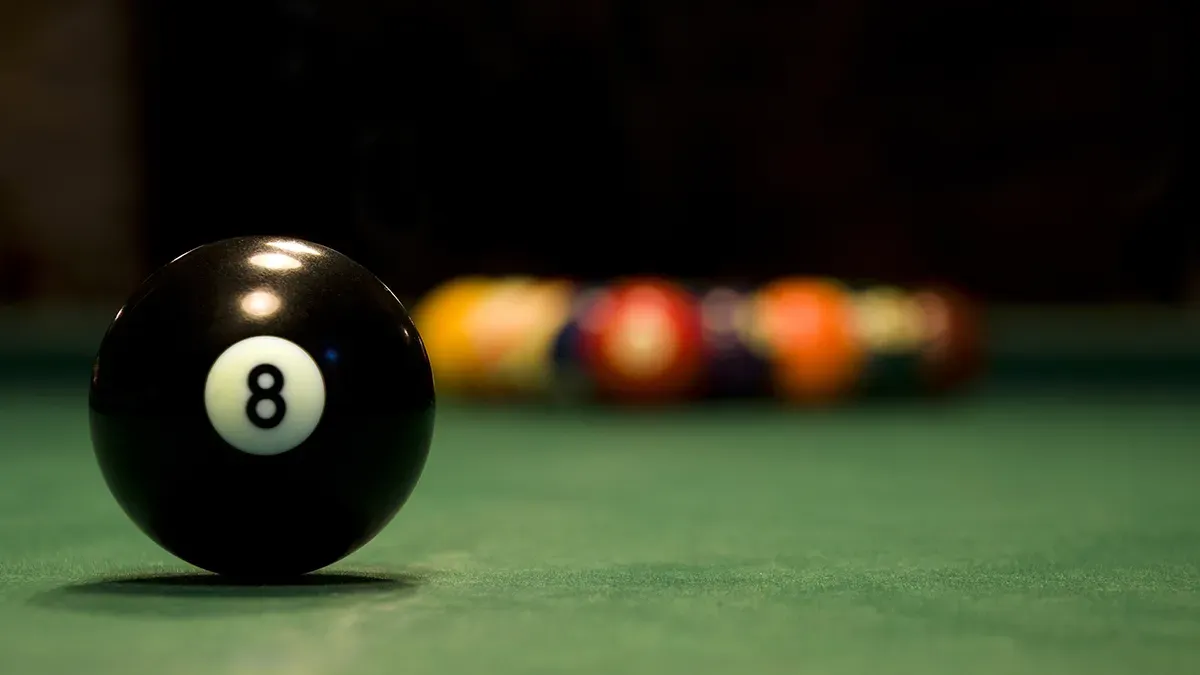
8-ball is a type of pocket billiards game played on a rectangular table. It's a rotation game where players aim to pocket their assigned group of balls (stripes or solids) and then the 8-ball to win.
Equipment
A standard pool table with six pockets.
A set of 16 balls: one cue ball (usually white), seven striped balls numbered 9 through 15, seven solid-colored balls numbered 1 through 7, and one black 8 ball.
A cue stick for each player.
Racking
Place the 15 object balls tightly in a triangular rack, with the apex ball on the foot spot and the 8 ball in the center of the third row.
The solid-colored balls (1-7) should be racked randomly in the triangle, and the striped balls (9-15) should be racked randomly behind them.
The rack should be centered on the foot spot.
Breaking
Players take turns to break, with the player who wins the lag or a coin toss having the option to break.
The cue ball is placed behind the headstring (the second diamond from the foot rail).
The break shot must cause at least four balls to hit cushions or pockets, or a combination of both.
Failing to make a legal break results in the opponent having the option to break or request a re-rack.
Gameplay
After the break, players take turns attempting to pocket balls of their designated group (solids or stripes).
A player's turn continues as long as they legally pocket balls.
If a player pockets a ball, they continue shooting and must legally pocket another of their group.
If a player pockets the cue ball or fails to hit any ball, it's a foul, and the incoming player gets the ball-in-hand anywhere on the table.
If a player pockets the 8 ball prematurely (before all their group's balls are pocketed), they lose the game.
The game continues until one player pockets all of their designated group's balls and legally pockets the 8 ball afterward.
Winning
A player wins by legally pocketing the 8 ball after pocketing all of their group's balls.
A player loses if they pocket the 8 ball prematurely, scratch while pocketing the 8 ball, or commit a foul while pocketing the 8 ball.
Fouls
Fouls include scratching (pocketing the cue ball), failing to hit any object ball, and illegal shots (e.g., hitting the wrong group of balls first).
Fouls result in ball-in-hand for the opponent, allowing them to place the cue ball anywhere on the table before their shot.
Legal Shots
Players must hit one of their group's balls first on every shot, except after the break or when pocketing the 8 ball.
If a player pockets one of their group's balls, they must then legally pocket another of their group, or the 8 ball if all their group's balls are pocketed.
Foosball

Foosball is a fun and fast-paced game that can be played by two or four players.
Setup
Each team consists of one or two players.
The table is divided into halves, with each half representing one team's side.
Place the ball in the center of the table.
Starting the Game
The game begins with a coin toss or another method to decide which team gets the first possession.
The team that wins the toss starts the game by serving the ball from their side of the table.
Serving
The ball must be stationary on the serving team's side before it is put into play.
Once the ball is stationary, the serving player must pass or shoot it into play.
Gameplay
Players use the rods to control the miniature soccer players (foosmen) on the table.
The objective is to score goals by hitting the ball into the opponent's goal.
Players must only use the rods to control the foosmen; they cannot touch the ball with their hands during gameplay.
Each team can use their goalkeeper to defend their goal and try to block shots from the opposing team.
Scoring
A goal is scored when the ball enters the opponent's goal.
The team that scores a goal gets the next possession and serves the ball.
Switching Sides
After one team scores a predetermined number of goals (e.g., 5 or 10), the teams switch sides of the table.
Winning the Game
The game continues until one team reaches a predetermined number of goals or until a set time limit is reached.
The team with the most goals at the end of the game wins.
Fouls
There are various fouls in foosball, including:
Spinning: Rapidly rotating the rods in a circular motion, which is not allowed.
Jarring: Aggressively shaking or moving the table to disrupt the opponent's gameplay.
Illegal formations: Not starting with the correct number of foosmen on the rods or moving them into illegal positions.
Fouls result in a turnover of possession, with the opposing team gaining control of the ball.
Sportsmanship
Foosball is a game of skill and sportsmanship. Players should respect their opponents and play fairly.
Unsportsmanlike conduct, such as verbal abuse or aggressive behavior, should be avoided.
Optional Rules
Some players may introduce additional rules or variations to suit their preferences, such as allowing "bank shots" off the walls or ceiling, or implementing a "no-spin" rule to prevent excessive rod rotation.
Darts | 301
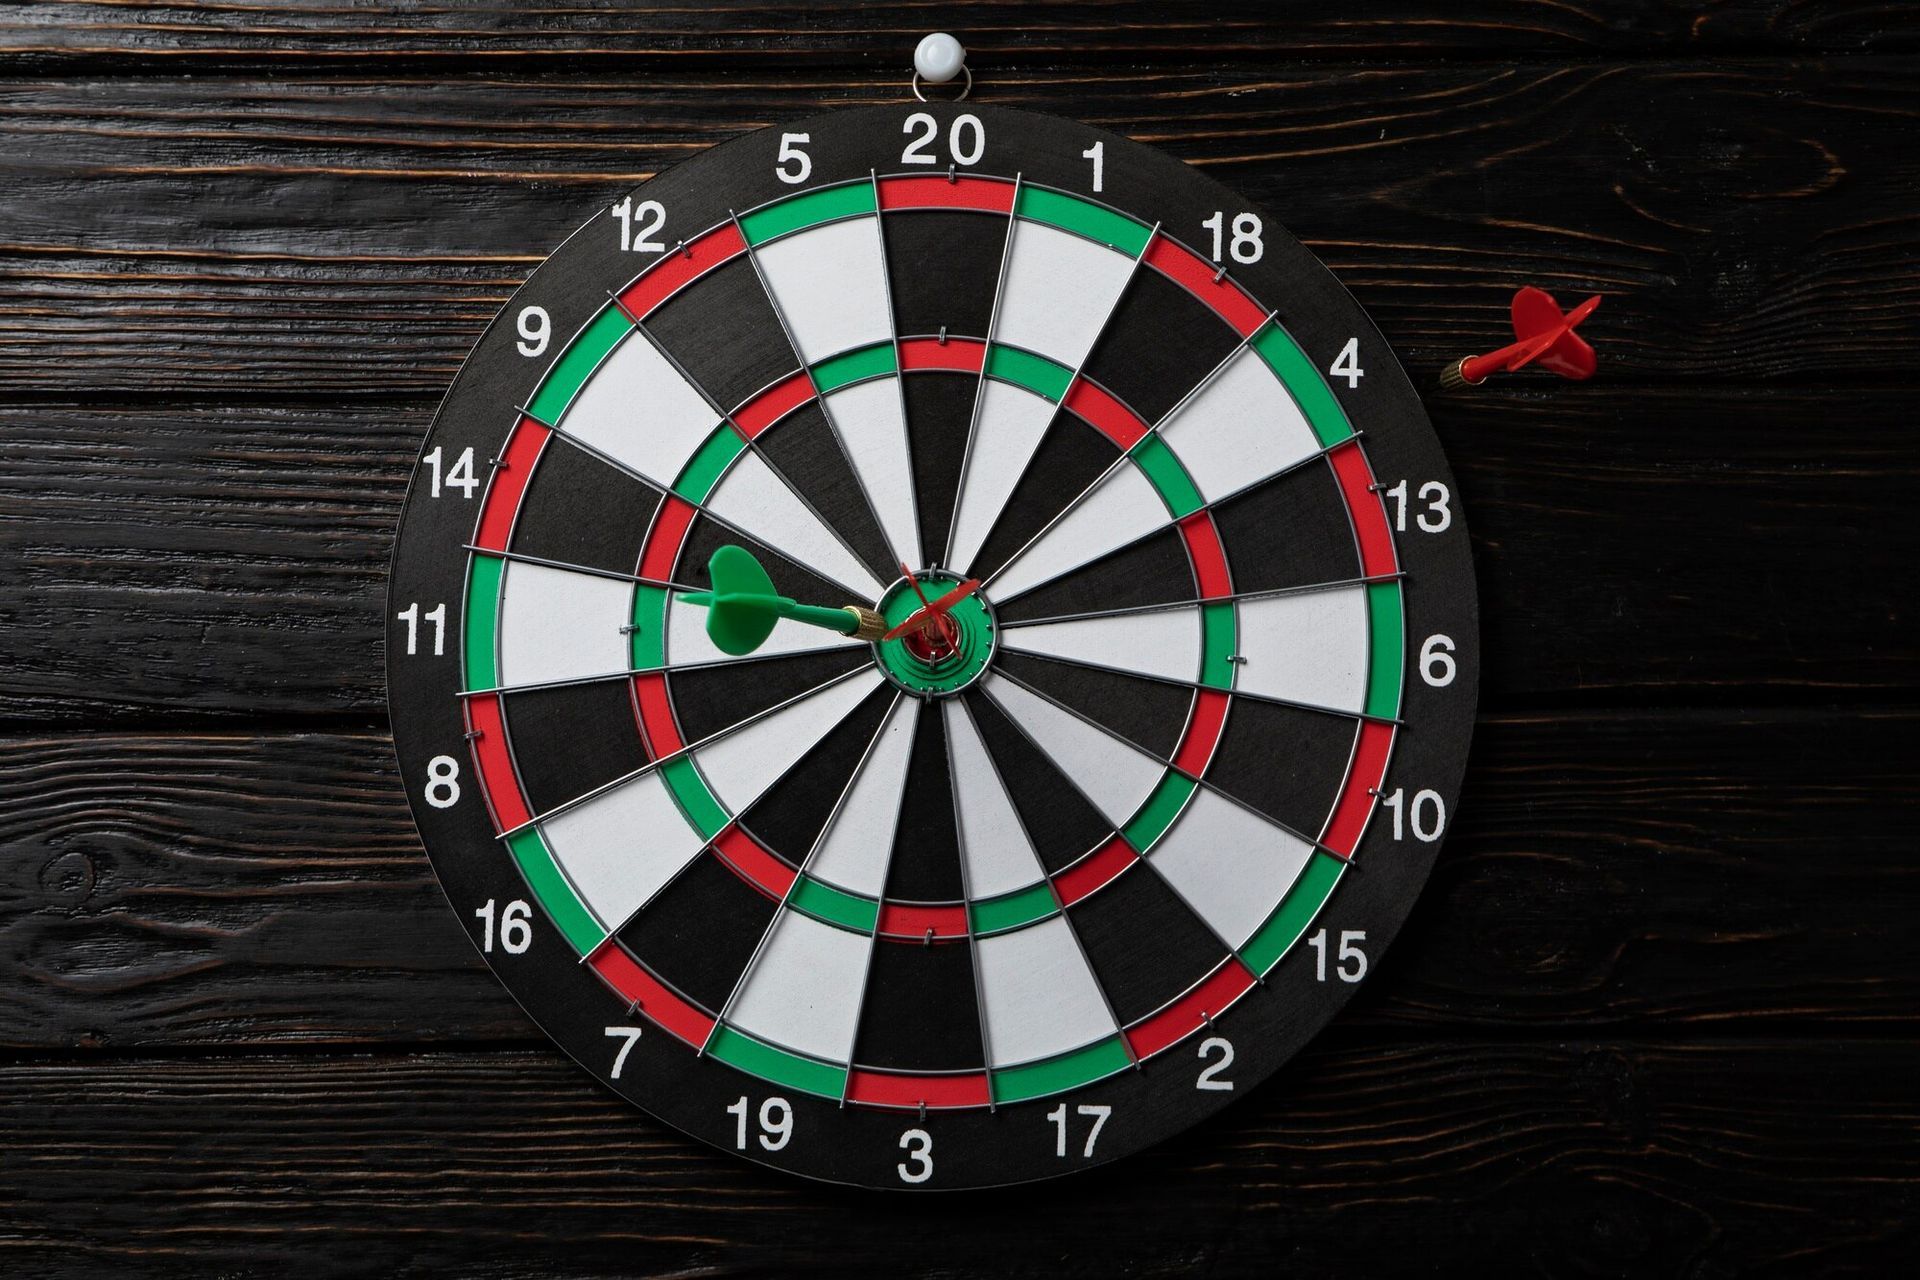
301 is a popular game in darts that involves players starting with a score of 301 points and attempting to reduce this score to exactly zero within as few darts as possible.
Starting Score
Each player starts with a score of 301 points.
Objective
The objective of the game is to reduce your score from 301 to exactly zero by subtracting the points scored in each turn from your total score.
Scoring
Players take turns throwing three darts each. The score from each throw is subtracted from the player's total. The standard scoring in darts is as follows:
A dart in the single section of a number scores the value of that number.
A dart in the double section (the narrow outer ring) of a number scores double the value of that number.
A dart in the triple section (the narrow inner ring) of a number scores triple the value of that number.
The bullseye (the innermost circle) is worth 50 points, and the outer bullseye is worth 25 points.
Bust Rule
If a player's score goes below zero at any point in their turn, that turn is declared a "bust," and the score remains the same as it was at the start of that turn. For example, if a player has a score of 10 remaining and they hit a 15, their score would go to -5, but it would revert back to 10, and the player would need to try again to reduce their score to zero.
Winning
The game is won by the first player to reduce their score from 301 to exactly zero. The winning player must accomplish this by hitting a double that brings their score exactly to zero. For instance, if a player has a remaining score of 32, they must hit a double 16 to win the game.
Alternate Ending
Some variations of 301 allow for a different winning scenario where a player can finish by hitting a double or a bullseye. This is often referred to as "double in, double out" or "master out." In this case, players must start by hitting a double to begin subtracting points from their score and can finish by hitting a double or a bullseye to reach zero.
Subsequent Rounds
After a player completes their turn, the next player takes their turn following the same rules until one player successfully reaches zero.
Strategy
Players need to strategize their throws to score as efficiently as possible, aiming for high-scoring areas on the board to reduce their score quickly. Additionally, players may employ tactics to leave themselves with favorable numbers for their next turn, such as finishing on a double or setting up an easier finish.
Darts | Cricket
Cricket in darts is a popular game that follows a set of rules that involve strategic thinking, accuracy, and a bit of luck.
Equipment Needed
Dartboard: The standard dartboard, which is divided into different numbered sections.
Darts: Each player needs a set of three darts.
Objective
The objective of cricket in darts is to score points by hitting specific numbers on the dartboard and "closing" those numbers before your opponent does.
Starting the Game
The game can be played by two or more players or teams.
Players typically toss a coin or use another method to determine who goes first.
Scoring
In cricket, only the numbers 15 through 20 and the bullseye (or bulls-eye) count. These numbers are referred to as "cricket numbers."
Each player or team aims to hit each of these numbers three times to "close" them.
To close a number, a player must hit it three times in any combination of singles, doubles, or triples. For instance, hitting the number 15 once counts as one mark, hitting it twice counts as two marks, and hitting it three times closes the number.
The bullseye counts as two numbers: the outer bull (or single bull) and the inner bull (or double bull). Both of these must be hit three times each to close the bullseye.
Playing the Game
Players take turns throwing their darts.
Each player throws three darts per turn, aiming to hit the cricket numbers or bullseye.
Points are scored based on the numbers hit on the dartboard.
If a player hits a number they have not closed yet, they start scoring points for that number. Each hit on an open number counts as one point.
If a player hits a number they have already closed, they earn additional points for that number. Each hit on a closed number counts as two points.
Players can also score points by hitting the bullseye. Hits on the outer bull count as one point, while hits on the inner bull count as two points.
Winning the Game
The game typically continues until all players or teams have closed all the cricket numbers and the bullseye.
The player or team that closes all the numbers and the bullseye first, and has the highest score, wins the game.
Darts | Around The World
"Around the World" is a popular darts with the objective being the first player to hit specific numbered targets on the dartboard in sequential order.
Equipment
A standard dartboard.
Three darts per player.
Setup
Players typically stand at a regulation distance from the dartboard (usually 7 feet 9.25 inches).
Decide the order of play, usually by throwing for the bullseye or by some other agreed-upon method.
Gameplay
Players take turns throwing three darts each.
The objective is to hit each number on the dartboard in sequential order from 1 to 20, and then the bullseye.
Players start with the number 1 and move clockwise around the board.
The outer (single) ring counts as one point per segment, the inner (double) ring counts as two points per segment, and the outer bullseye (or 'single bull') counts as 25 points, while the inner bullseye (or 'double bull') counts as 50 points.
Players must hit the target number before moving on to the next number.
If a player fails to hit the target number in three darts, their turn ends, and they must try again on their next turn.
Once a player successfully hits the required number, they move on to the next number on their next turn.
Winning the Game
The first player to hit all the numbers from 1 to 20 and then the bullseye in order wins the game.
If a player hits the wrong number or misses the board entirely, they must continue trying to hit that number until they succeed before moving on to the next one.
In some variations, hitting a double on a number can count as a "passport" to move on to the next number without having to hit the single segment first. This rule can speed up the game.
Scoring
The game can be played with or without scoring. In some casual settings, players may opt not to keep score, simply focusing on completing the sequence of numbers.
If scoring is used, players can keep track of their progress by noting the number of darts taken to hit each number. The player with the lowest number of darts at the end of the game wins.
Darts | Killer
"Killer" is a popular dart game typically played by two or more players. The objective of the game is to be the last player remaining, or the "killer" who eliminates all other players by hitting certain target areas on the dartboard.
Equipment Needed
A standard dartboard.
A set of darts.
Setup
Determine the order of play by any agreed-upon method, such as throwing closest to the bullseye or drawing numbers from a hat.
Each player takes turns throwing one dart at the board. The closest to the bullseye goes first, with subsequent turns proceeding clockwise.
Gameplay
Each player starts with a predetermined number of lives (commonly 3 or 5).
The first player (the "killer") selects a number on the dartboard that will represent their target. This is typically done by calling out the number before throwing.
The killer then tries to hit their chosen number with their darts.
If the killer successfully hits their target number, they score points equal to the number hit (e.g., if they hit the 20, they score 20 points).
The killer continues throwing until they fail to hit their target number or until they choose to stop. If they miss, their turn ends, and they do not score any points.
After the killer's turn, the next player in the rotation takes their turn.
If a player who is not the killer hits the target number chosen by the killer, they become a "victim" and lose one life. They also take over as the killer in the next round. If the killer hits their own number, they typically gain an additional life (optional rule).
Players continue taking turns in rotation until only one player remains with lives remaining, who is declared the winner.
Additional Rules
Doubles and triples count as double or triple the number hit, respectively.
If a player hits their own target number with all three darts in a single turn, they may choose another player to lose two lives instead of one.
If a player reaches zero lives, they are eliminated from the game.
Players can agree upon additional rules or variations before starting the game, such as banning certain numbers or adding special scoring conditions.
Winning the Game
The last player remaining with lives is declared the winner and becomes the "killer" in the next game if playing multiple rounds.
Jenga
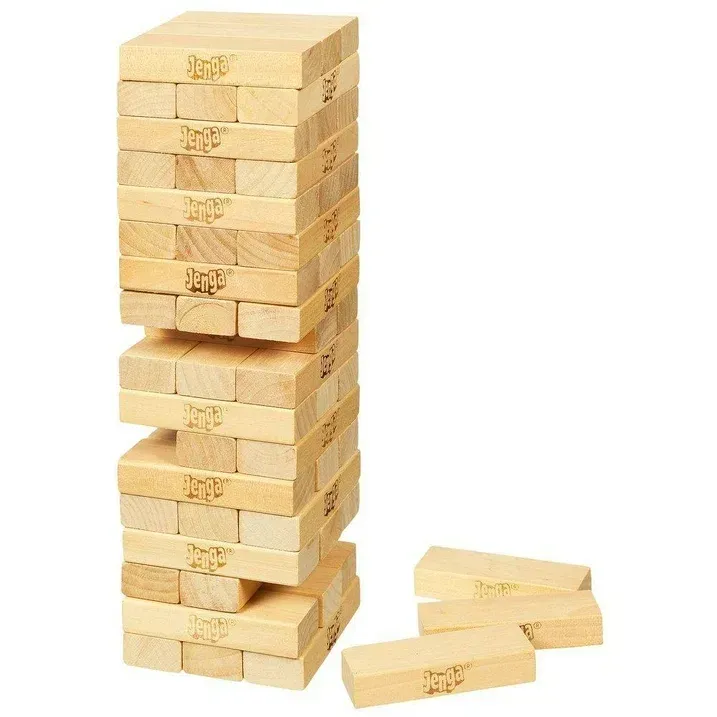
Jenga is a classic game of physical and mental skill, where players take turns removing one block at a time from a tower constructed of 54 wooden blocks. The goal is to remove blocks from the tower and stack them on top, creating a taller and increasingly unstable structure, without causing the tower to collapse.
Setup
Begin by setting up the Jenga tower. Start by placing three blocks in each layer, alternating the orientation of the blocks to form a sturdy rectangular tower. Each layer should be perpendicular to the layer below it, creating a grid pattern.
Once you've completed the first layer, place another layer of three blocks perpendicular to the first layer on top of it. Continue this pattern until you have a tower of 18 layers, with each layer containing three blocks.
Ensure the tower is stable and not leaning excessively in any direction. A stable tower is essential for fair gameplay.
Gameplay
Decide who goes first. You can determine this by flipping a coin, drawing straws, or any other method of random selection.
The first player gently taps a block with one hand to determine its stability. They must choose a block that they believe they can safely remove without causing the tower to collapse.
Once a block is selected, the player uses only one hand to carefully pull it out from the tower. Players should avoid using excessive force or causing the tower to sway excessively.
After successfully removing a block, the player places it on top of the tower, perpendicular to the blocks below it. This continues the alternating pattern and creates a taller structure.
Players must complete their move within a reasonable time frame. If a player takes too long to make their move, they may be subject to a time limit decided by the group.
The game proceeds with players taking turns removing blocks and stacking them on top of the tower. As the tower grows taller, it becomes increasingly unstable, making each move more challenging.
Endgame
The game continues until the tower collapses. The collapse can occur due to a player's move or simply due to the inherent instability of the tower as it grows taller.
The player who caused the tower to collapse loses the game.
Alternatively, you can play multiple rounds, with each player taking turns as the starting player. The player with the fewest collapses at the end of the rounds is declared the overall winner.
Connect Four
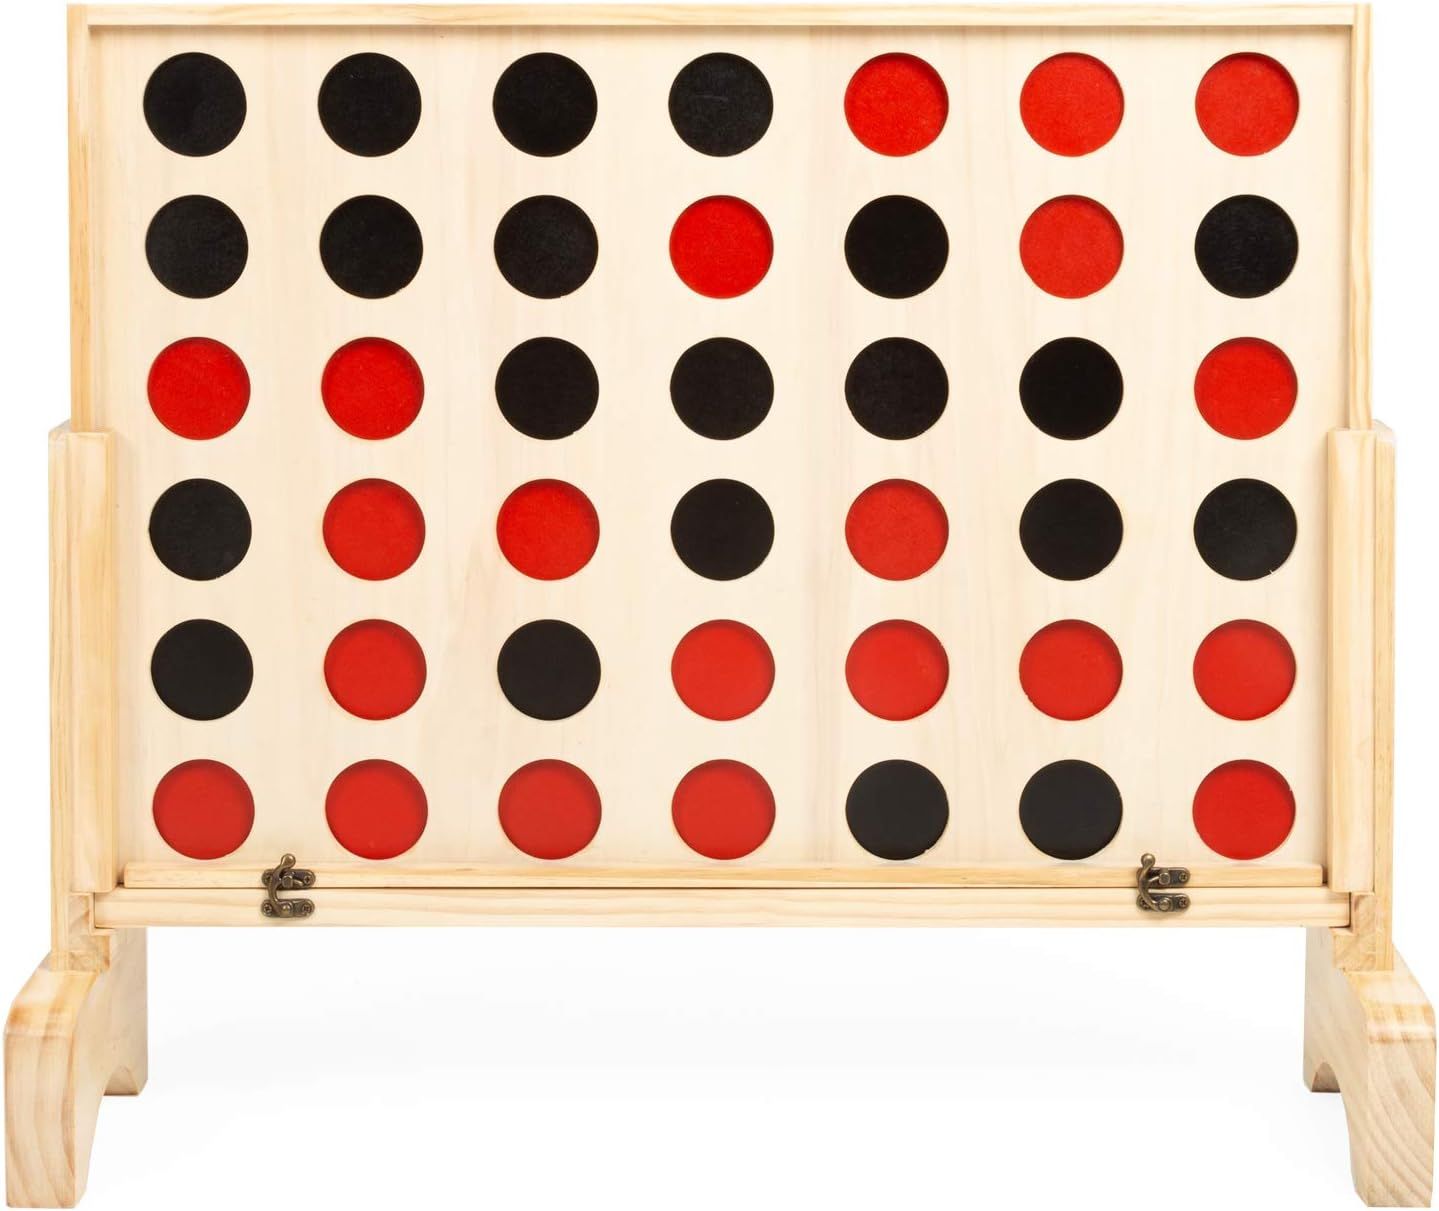
Connect Four is a classic two-player game that involves strategy and spatial reasoning. Here's a detailed description of how to play:
Objective
The objective of Connect Four is to be the first player to get four of your colored discs in a row horizontally, vertically, or diagonally on the game board.
Game Setup
The game board is a grid consisting of 7 columns and 6 rows, totaling 42 spaces.
Each player chooses a color, typically red or yellow, and takes turns dropping their colored discs into the columns from the top.
Decide who goes first. Players can flip a coin, play rock-paper-scissors, or use any other method to determine the starting player.
Gameplay
The first player drops one of their colored discs into any column on the game board. The disc will fall to the lowest available space in that column.
The second player then drops one of their colored discs into any column, also falling to the lowest available space.
Players take turns alternately dropping their colored discs into the columns until one player achieves the winning condition (getting four of their colored discs in a row) or the game board is filled without a winner, resulting in a tie.
Winning Conditions
A player wins the game when they have four of their colored discs in a row horizontally, vertically, or diagonally on the game board. The row of four can be achieved in any direction: horizontally (side-to-side), vertically (up and down), or diagonally (across the board).
Game Strategy
Blocking: Try to anticipate your opponent's moves and block their attempts to create a row of four.
Building: Simultaneously, strategize to create your own rows of four while blocking your opponent.
Center Columns: Dropping discs in the center columns can give you more options for creating rows in different directions.
Edge Columns: While center columns offer more flexibility, edge columns can be useful for creating quick, less-obvious winning combinations.
Pay Attention to Patterns: Observe potential patterns forming on the board, both for yourself and your opponent, and adjust your strategy accordingly.
Game End
The game ends when one player successfully connects four of their colored discs in a row or when the game board is filled completely without a winner, resulting in a tie.
Card Games | Spade
Spades is a classic trick-taking card game that is typically played with four players in partnerships. It is a game that combines elements of strategy, teamwork, and careful card management. The objective of the game is to accurately predict and then win as many tricks as possible.
Setup
Players: Spades is usually played by four players, divided into two teams of two players each. Partners sit across from each other.
Deck: A standard 52-card deck is used. The cards rank from highest to lowest: A, K, Q, J, 10, 9, 8, 7, 6, 5, 4, 3, 2. Spades are always the trump suit.
Dealing: The dealer shuffles the deck and deals the cards one at a time in a clockwise direction, starting with the player to their left. Each player receives 13 cards.
Bidding
Starting Bid: The player to the dealer's left begins the bidding process. Each player, in turn, makes a bid indicating the number of tricks they believe their team will win.
Bidding Rules: Players must bid a number between 0 and 13, representing the number of tricks their team will win. The sum of the bids made by both teams cannot equal 13, as that would guarantee that all the tricks will be won.
No Blind Bidding: In traditional Spades, there are no blind bids. Players must bid based on the strength of their hand.
Gameplay
Leading: The player to the dealer's left leads the first trick by playing any card from their hand.
Following Suit: Each player, in turn, must play a card of the same suit as the first card played if possible. If a player cannot follow suit, they may play any card, including a spade.
Trumping: If a player plays a spade while following suit is possible, it beats all other cards played in that trick.
Winning Tricks: The player who played the highest-ranking card of the leading suit (if no spades were played) or the highest-ranking spade wins the trick.
Leading the Next Trick: The player who won the previous trick leads the next one.
Scoring: After all 13 tricks have been played, each team's total number of tricks is compared to their bid. Teams score 10 points for each trick bid and won. However, if a team fails to meet their bid (overtricks or undertricks), they score negative points.
Overtricks: If a team wins more tricks than they bid, each overtrick is worth one point.
Undertricks: If a team wins fewer tricks than they bid, each undertrick is worth 10 points.
Winning the Game
The game typically continues until one team reaches a predetermined score, often 500 points or another agreed-upon value.
The first team to reach or exceed the agreed-upon score wins the game.
Strategy Tips
Counting Cards: Keep track of the cards played to make informed decisions about which cards to play.
Communication: Partners should use bidding and gameplay to communicate information about their hands to each other.
Playing High Cards: In general, it's advisable to play high cards early in the game to win tricks and establish control.
Card Games | War
War is a simple and classic card game typically played by two players, although it can be adapted for more players. The objective of the game is to win all the cards in the deck.It is a game of chance, and there's no strategy involved, making it suitable for players of all ages.
Setup
Start with a standard deck of 52 playing cards.Shuffle the deck thoroughly.Deal the entire deck evenly between the players. Each player should have a stack of face-down cards.
Gameplay
Both players simultaneously turn over the top card from their respective stacks and place them face-up in the center of the playing area. This forms the "battle" pile.The player with the higher-ranking card (according to standard card ranking - Ace being the highest, followed by King, Queen, etc., down to 2 being the lowest) wins the battle. The suit of the card is irrelevant in War.The player who wins the battle collects both cards from the center and places them face-down at the bottom of their stack.In the event of a tie (i.e., both players draw cards of equal rank), a "war" occurs. Both players must place three face-down cards from their stack followed by a fourth card face-up. The player whose fourth card has the higher rank wins all the cards in the war, including those that were placed face-down. If there's another tie, the process continues until one player's face-up card is higher than the other's.The game continues with players repeating steps 1-4 until one player has won all the cards.Winning the Game: The game ends when one player has collected all 52 cards. That player is declared the winner.
Variations
Number of Cards in War: Some variations allow players to place more than three cards face-down during a war, which can make the game more intense and unpredictable.War with Multiple Players: To play with more than two players, you can still follow the basic rules, but you may need additional decks of cards depending on the number of players. In case of a tie, players involved in the war can be decided clockwise or counterclockwise.Special Rules: Some players add special rules to the game, such as allowing players to "burn" certain cards before starting a war or introducing a penalty for losing a war, like skipping a turn.
Card Games | Rummy
Rummy is a classic card game that is played with a standard deck of 52 cards. The game's objective is to form sets and runs of cards in your hand and lay them down on the table. The player who successfully gets rid of all their cards first wins the game.
Setup
Rummy can be played by 2 to 6 players. A standard deck of 52 cards is used, without jokers. A dealer is chosen randomly for the first round, and then the turn passes clockwise after each round. Each player is dealt a specific number of cards depending on the variation being played. Typically, in a 2-player game, each player gets 10 cards, and in a 3-4 player game, each player gets 7 cards. If there are more players, you may need more decks.
Objective
The objective of Rummy is to form valid sets and runs with the cards in your hand and to reduce the number of unmatched cards.
Valid Sets and Runs
Set: A set consists of three or four cards of the same rank but different suits. For example, 7♠️, 7♦️, and 7♣️ form a set.
Run: A run consists of three or more consecutive cards of the same suit. For example, 4♠️, 5♠️, and 6♠️ form a run.
Gameplay
The player to the left of the dealer starts the game.
On each turn, a player must draw one card, either from the stock pile or the discard pile.
After drawing, the player must choose one card to discard, placing it face-up on the discard pile.
The turn then passes to the next player in a clockwise direction.
Laying Down Cards
Once a player has formed valid sets or runs in their hand, they can lay down these combinations on the table during their turn. This is called 'going out'.
A player must have at least one valid set or run to go out.
After laying down their cards, the player must place the remaining cards in their hand face-down on the table. These are called 'deadwood' cards.
Ending the Game
The game ends when a player has laid down all their cards on the table (gone out).
Players calculate their scores by totaling the value of the deadwood cards left in their hands.
Face cards (Jacks, Queens, and Kings) are worth 10 points each, and numbered cards are worth their face value.
If a player goes out, they do not count the value of the cards they laid down.
The winner of the game is the player with the lowest total score after each round.
Scoring
The winner of the game scores zero points.
Other players score points equal to the total value of the cards left in their hands.
The game is usually played over several rounds, and players keep track of their cumulative scores.
Continue Playing
After scoring, the players shuffle the cards and the role of dealer passes to the next player. The game continues with subsequent rounds until a predetermined winning score is reached or players decide to end the game.